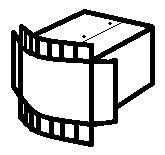
How to Make an Oil Drum for Use as a Pizza Oven, Barbecue,
Chimenea, and Garden Incinerator
You
are at: [Website -Home] >
[Useful Hints - Oil Drum Burner] ![]() [Contact Us!]
[Contact Us!]
This shows how you can
convert an oil drum or oil barrel for use as a pizza oven, barbecue, chimenea
heater, and garden burner.
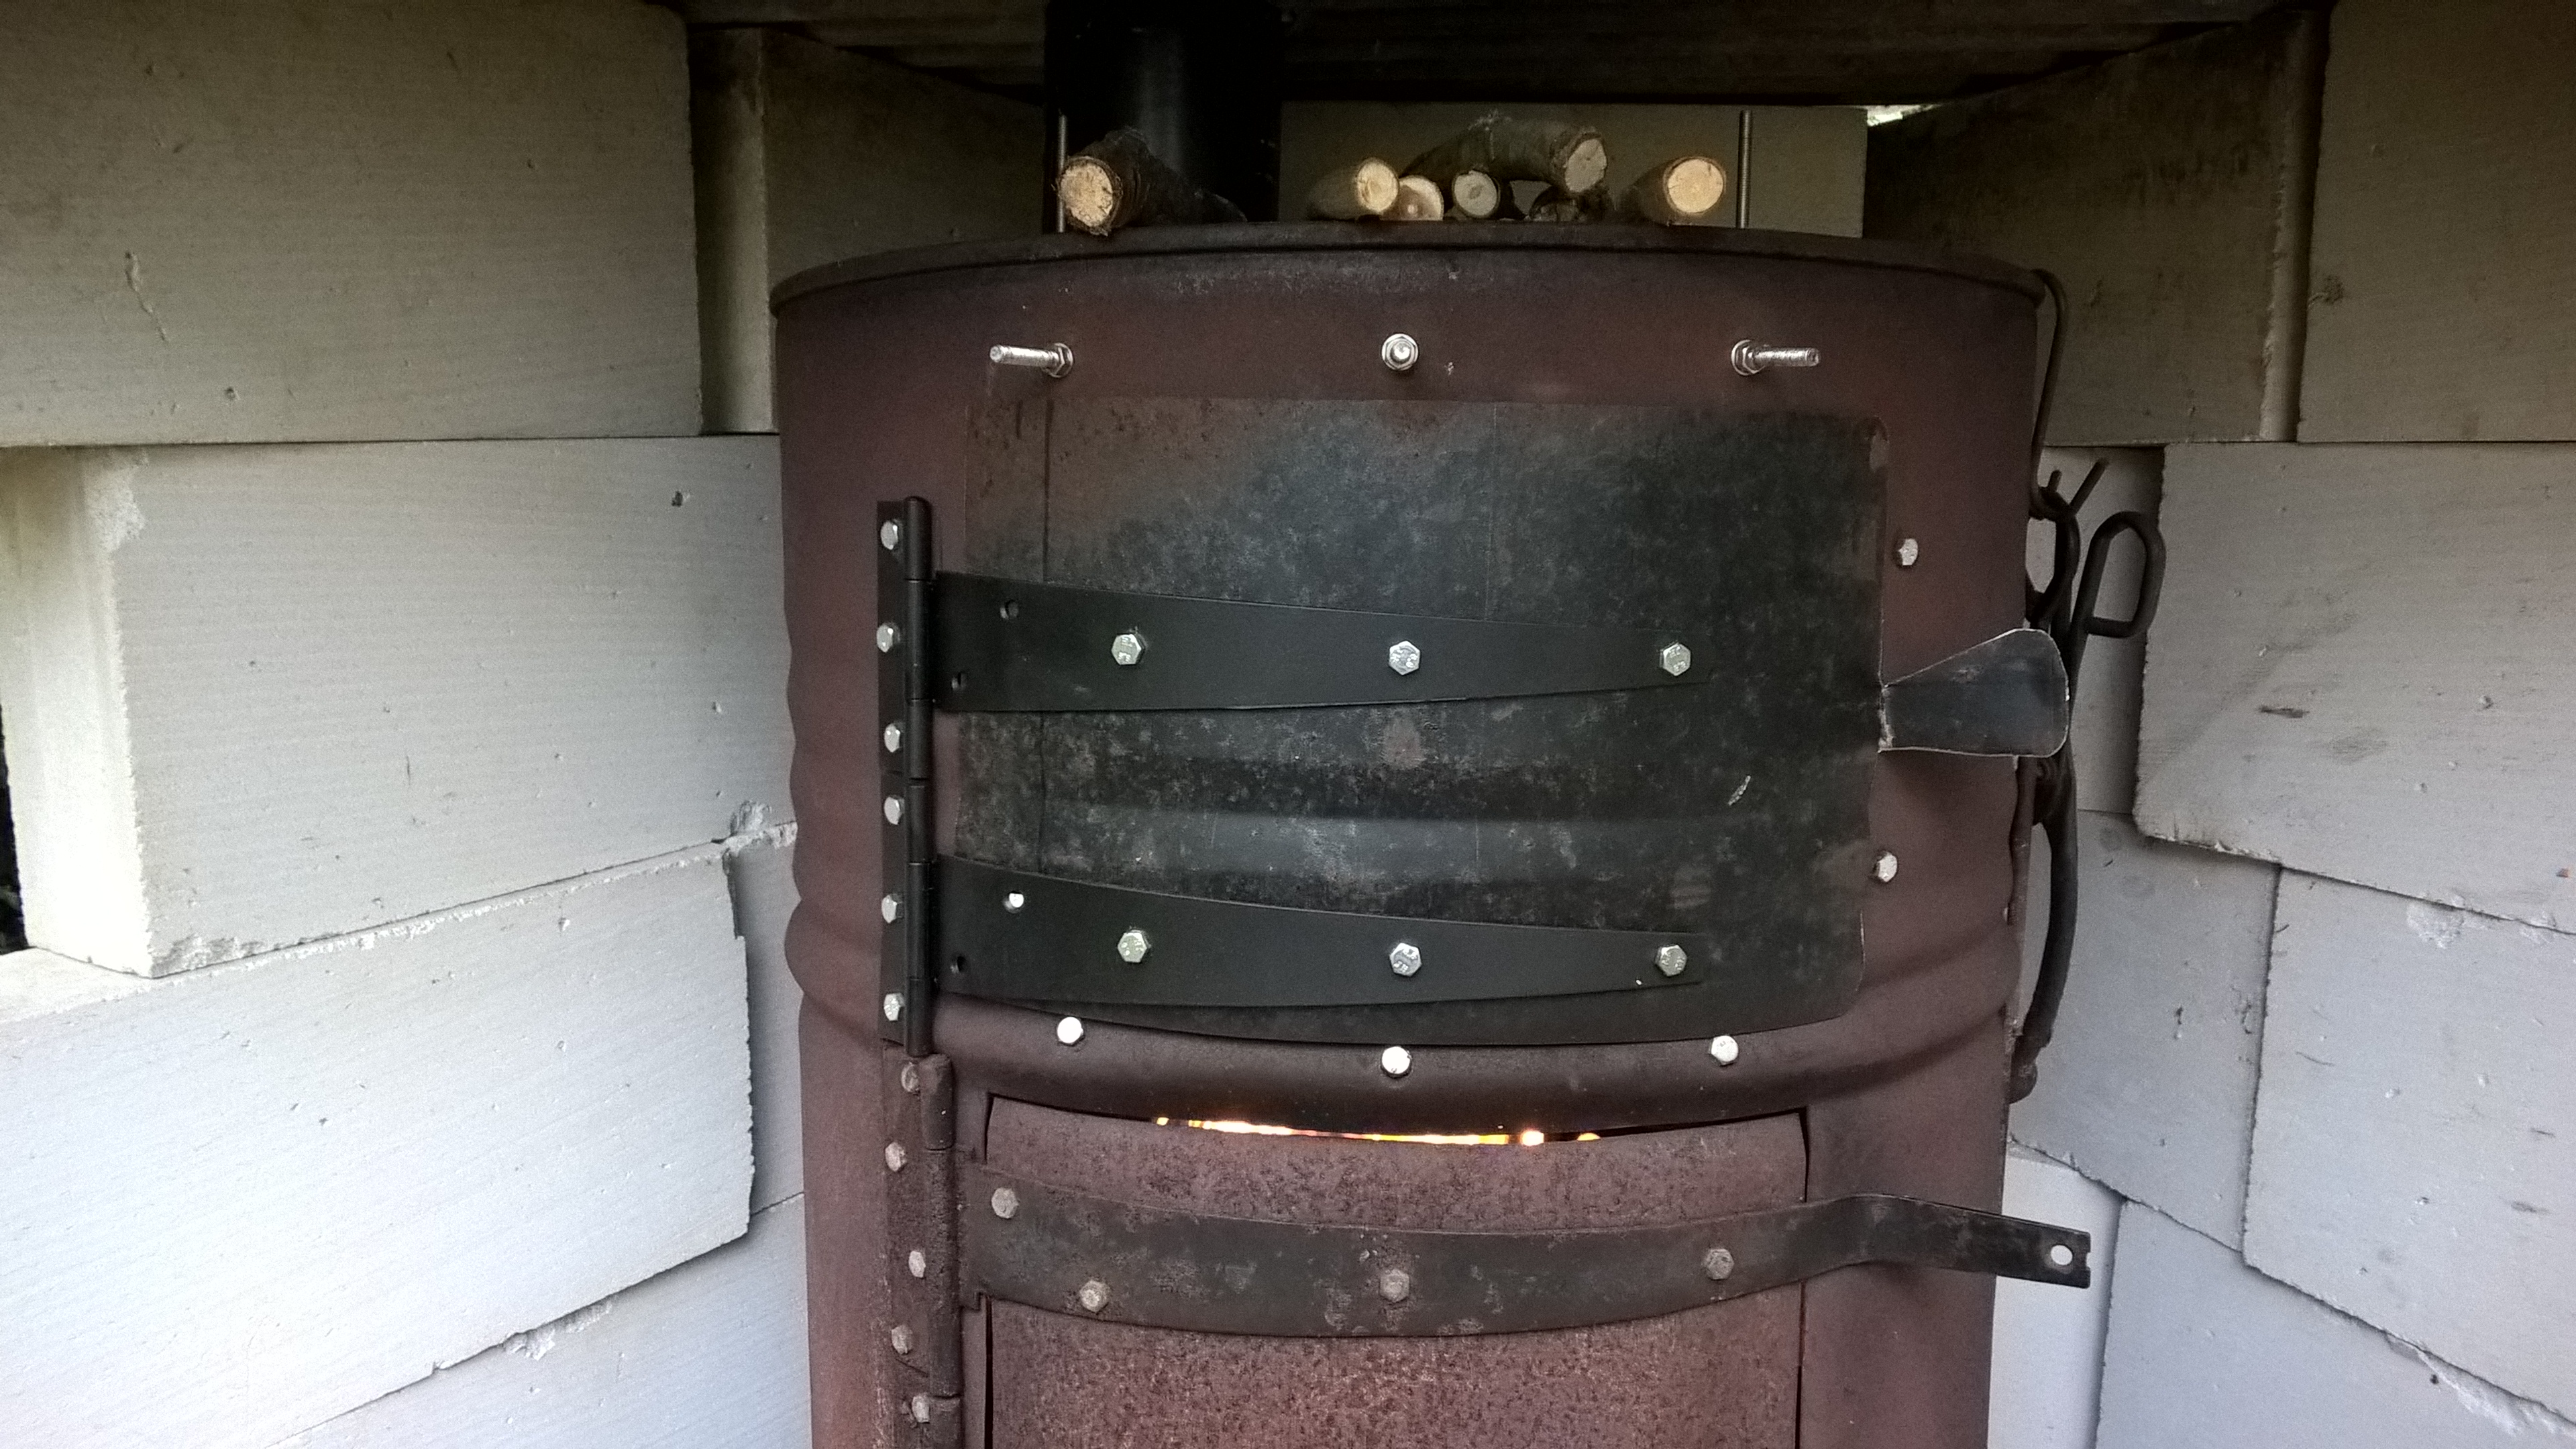
STAGE 1:
THE BARBECUE / CHIMENEA HEATER / GARDEN INCINERATOR (WITHOUT OVEN)

![]() Watch the mp4
video of the barbecue / chimenea / garden incinerator (1m:09s)
Watch the mp4
video of the barbecue / chimenea / garden incinerator (1m:09s)
Materials
You need these
materials:-
|
|
an oil drum |
|
|
two door/gate hinges (flat hinges
about 16 inches long, bendable by hand) |
|
|
a disused fireplace/grating (or
another hinge) |
|
|
a flue pipe (see * and images
below) 4 feet or more tall |
|
|
8 nuts, bolts, and washers (size
M6) for each hinge |
Bend the
hinges for the door to fit the curve of the drum;
Mark onto the drum the rectangle for the door—over the full height of the smooth
central section of the side of the drum;
Mark the bolt hole locations onto the drum;
Drill the bolt holes;
Cut out the rectangle to form both a neat door and doorway—the finer the cut
the better, so use the thinnest available metal-cutting disc on an angle
driver, or jig-saw;
File the door and doorway to be smooth for safety;
Assemble the nuts, bolts, and washers to anchor the door hinges onto the drum;
Likewise bolt the door hinges onto the door;
Bend part of the overhang of the hinges away from the drum to form handles
Choose you system lower ventilation—either an old fireplace, or to a simple
door rather like the one above but narrower;
To accommodate an old fireplace mark and cut out a rectangle just large enough;
To make a simple ventilation door instead design one similar to the one above,
but narrower and with only one hinge on the side;
Allow some extra hinge length for you to form a handle with some of the excess
This lower door could be formed in two halves using two smaller hinges, one
each side;
* Make a removable flue... (or 3‑guyed permanent flue and cowl—see the
oven shown below)
(On my first test I simply stood a 2-inch old metal drain pipe in the drum's
filler cap hole, and this just about worked;)
(Next, I went to a scrap metal business and bought a 3-inch flue off a butane
heater—this improved performance despite still using the 2-inch hole;)
(I further improved updraught through this 3-inch fluepipe by cutting a new
5-inch hole in the top of the drum—well clear of the 2-inch filler cap hole;)
You can make up a suitable 5-inch hole by marking the shape and...
...cutting 12 slots diametrically (every 30°) to form 12 segments of metal;
File the edges smooth for safety;
Alternately bend the segments up so that one fits outside the bottom of a
5-inch flue pipe and the next one fits tightly on the inside of it—to take the
weight of the flue and provide a reasonably smoke-tight seal;
If you have a length of 5-inch fluepipe and don't want to use another flue
device, screw the filler cap back on, and insert your fluepipe into the 5-inch
hole during use
You may wish to remove the flue to a dry store after use—especially if you have
no rainproof cowl on top of it.
STAGE 2:
THE OVEN FOR PIZZAS, BAKING, AND ROASTING
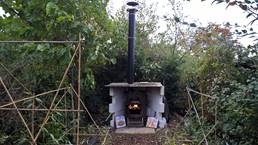
See in detail the
completed oil drum used for an oven / chimenea / barbecue / incinerator
![]() Video of the oil drum and
oven (Short) (1m:39s)
Video of the oil drum and
oven (Short) (1m:39s)
![]() Video of the oil drum and
oven (Full) (3m:10s)
Video of the oil drum and
oven (Full) (3m:10s)
Materials
You need these
additional materials:-
|
|
a sheet of standard steel
22 SWG thick×500 mm×1000 mm |
|
|
two door/gate hinges (flat hinges
about 12 inches long, bendable by hand) |
|
|
a curved sheet of metal to form
the door—saved from the panel cut out during Stage 1 for the bottom air
inlet / ash pan |
|
|
25 size M6 bolts 38 mm long
with nuts and washers (size M6) for assembling the box and mounting the
hinges |
|
|
6 size M6 bolts 19 mm long
with nuts and washers (size M6) for fixing the hinges to the door |
|
|
1 m long M6 threaded steel
rod with two washers and four nuts |
|
|
a larger, taller, permanent flue
pipe may be desired with three 3 mm guy cables and a cowl |
|
|
1 m of 6·5 mm fire rope,
a small pot of fire rope adhesive, and a cartridge of fireproof sealant |
Making
The Rear Of The Oven
![]() See the completed rear of
the oven box
See the completed rear of
the oven box
Mark the steel sheet with four lines dividing the 1000 mm length into 157,
200, 286, 200, and 157;
Fold the sheet by 90°
along the four lines to form a rectangular tube with 32 mm overlap in the
middle of the future box top;
Drill a holes for an M6 bolt centrally in the overlap;
Insert an M6 bolt from the inside of the tube and fix its washer and nut, thus
forming a tube 286 mm wide and 200 mm high;
Drill two holes for M6 bolts 90 mm from the central bolt and also on the
centreline of the overlap;
Insert two M6 bolts from the inside of the tube and fix their washers and nuts;
Mark a line around the tube to form a ring 116 mm from one end of it;
Mark four lines at the four corners of this end running along the four bends
from the outer edge to the ring line;
Saw along these four lines from the outer corners to the ring line, thus
creating large flaps at the sides, bottom, and top—the latter comprising two
overlapping sections;
As always, remove burrs with a file or a grinder;
Bend as squarely as possible the side flaps inwards through 90°;
Bend as squarely as possible the bottom and top flaps inwards through 90° to
form the rear face of a box;
Place the box with its rear face uppermost over a timber block onto which the
flaps can be pressed, hold the box to the required shape, and drill a hole
centrally;
Insert a bolt through this hole from the inside of the box and fix its washer
and nut—a large flat washer internally and externally would provide extra
rigidity;
Similarly drill 8 more holes through the rear face, then insert and fix the
bolts, washers and nuts—taking care that the overlaps are firmly so as to close
all air gaps.
![]() See the completed rear of
the oven box
See the completed rear of
the oven box
Making The Front Of
The Oven
![]() See the completed front of
the oven box
See the completed front of
the oven box
Use a template to mark
the curvature of the oil drum on the front end of the top and bottom of the
box, so that the arc is 32 mm from the end of the centreline of the box
and positioned symmetrically;
Draw another arc 32 mm outside the first arc;
Mark four lines at the four corners of this end of the box running along the
four bends from the outer edge to the top and bottom inner arc lines;
Saw along these four lines from the outer corners to the inner arc lines
Bend as tightly as possible the two side flaps back well beyond 90° and
continue to curve them to correspond to the curvature of the oil drum;
Saw along the top and bottom outer arcs, remove excess, and tidy edges;
Mark and saw radial lines from the inner arcs to the outer edges to form seven
equal full rectangular tabs;
Bend the upper tabs as tightly as possible at 90°upwards and bend the lower
tabs downwards;
Bend the four small remaining tabs in the corners similarly
Drill through the centre of the upper and lower middle tabs to take M6 bolts;
Record the distance from these holes to the centres of the outer tabs, as holes
will need to be drilled correspondingly through the front of the oil drum
later.
![]() See the completed front of
the oven box
See the completed front of
the oven box
Installing The Oven
And Door
![]() See the completed door and
oven mounting
See the completed door and
oven mounting
On stiff paper or card
draw the shape of a door opening roughly like a “D” on its side, 175 mm
high and 270 mm wide at the bottom;
Cut the shape out and position it symetrically on the front of the oil drum
with its bottom edge at least 50 mm above the top of the fire door
opening;
Check that your bottom edge mark is more than 245 mm below the inside top
of the oil drum so as to accommodate the oven box;
Draw the opening with a permanent marker pen and saw this out leaving it with a
neat edge;
Measure the distance from the inside bottom of the oven to the centre of the
hole in the upper central tab
Mark a point on the centreline of the front of the oil drum at the same
distance above the bottom of the door opening
Centrepunch and drill through this point ready to take an M6 bolt;
Measure the distance between the holes in the upper and lower front tabs of the
oven and then make a mark below the door opening at a corresponding distance
below the hole that has been made above the opening;
Mark the middle of the threaded steel rod and a point 140 mm each side of
it;
Bend the steel rod in the same plane through 90° at the outer marks that are
280 mm apart to form a large “U”-shape;
On the top of the oil drum mark the centreline corresponding to the centreline
on the front;
Mark a point on this line on the top of the drum 280 mm from the front
edge;
Mark and drill two holes offset from this point by 140 mm at 90° each side
of the centreline—to accommodate the steel rod;
Insert the ends of the steel rod from inside the drum, and then add a washer
and a nut on each end—to form a level hanger;
Temporarily bend back the side flaps of the front of the oven, so that it can
be inserted through the fire chamber door, and after inserting it, bend the
flaps back to how they were;
Push a bolt through from the rear of the hole in the upper front tab of the
oven;
Insert the rear of the oven through the internal hanger and swing the front
forward to be level with the bottom of the door opening—adjusting the hanger
height to suit;
Guide the protruding bolt in the top of the oven tab so that it appears through
the hole above the door opening, then apply a nut;
Insert a bolt through the rear of the hole in the lower front tab of the oven
and further on through the hole below the door opening;
Apply a nut on this bolt, then drill four holes corresponding to the centres of
the outer tabs, as recorded earlier;
Undo the bolts and release the oven;
Insert two more bolts through the rear of the two new holes in the upper tabs;
Offer the oven up again, gradually feeding the three upper bolts through the
three holes above the door opening, and then apply their nuts;
Feed bolts through the lower three holes and apply their nuts;
Check that the side flaps of the oven are firm against the inside of the drum,
then drill two holes from the outside of the drum and through the right hand
tab (left hand tab, if you’re mounting the hinge on the right hand side) to
take two bolts;
Undo the nuts as necessary to release the oven again, and then support it
cleanly within the fire chamber;
Apply fire rope adhesive around the lip of the front of the oven and, starting
from the middle at the top, feed the fire rope onto the adhesive, ensuring that
the cut ends of the rope are wrapped in fire tape to prevent fraying;
Apply fireproof sealant using a cartridge gun, ensuring that a generous layer
adheres to the tabs around the outside—but not on the exposed face—of the fire
rope;
For the final assembly process you may welcome help to adjust the height of the
hanger or to affix washers and nuts:
With one hand supporting the oven offer it up, gradually feeding the upper
three bolts through the holes above the opening, and then apply washers and
nuts;
Bring the oven level, adjusting the hanger to suit;
From the front now insert the three lower bolts from the outside, then add the
washers and nuts from the inside;
Gradually tighten these six bolts to ensure that the surfaces with the rope and
sealant between them are drawn together evenly and without distortion or gaps;
Insert four bolts through from the outside to fix the side flaps of the oven,
then apply their washers and nuts;
An oven door can be made 360 mm wide and 220 mm high, perhaps using
the curved panel cut away from the front of the oil drum earlier when forming
the cut out (during Stage 1) for the bottom air inlet / ash
pan access—if trimming a panel to his width, you could leave a tab at one side
that can later be bent outwards to form a simple handle;
Slightly lessen the curvature of the panel, so that it fits exactly around the
front of the drum and covering the oven opening;
Bend the two hinges
to match the curvature of the door panel;
Position the door panel with the hinged edge some 20 mm from the hinge
axle;
It’s good, if the door almost sits on the lower three bolts, as this can be
sufficient to hold it closed with no further ado;
Choose how to position the two hinges, so that the (6) bolts used to fix it to
the door will pass clearly through the door opening, and not clash with the
surrounding front of the drum;
Check that the (so far unfixed) side flap of the oven near the hinges is firm
against the inside of the drum;
Mark and centrepunch for holes for the (6) bolts that will hold the hinges onto
the drum, and then drill through the front of the drum and through the flap
behind it;
Install the hinges with the long bolts, and attach washers and nuts internally;
When you position the door, you will observe the need to kink the hinge arms to
overcome the thickness of the door—so, carefully do this, taking care not to
twist the hinge arms;
Note the exact position of the door opening behind—if necessary, marking the
outline of your “D” template onto the door;
Mark, centrepunch, and drill for the bolts to attach the door, insert the short
bolts from the outside, and attach washers and nuts.
![]() See the completed door and
oven mounting
See the completed door and
oven mounting
STAGE 3:
USING THE OIL DRUM PIZZA OVEN
Equipment
You need this
equipment:-
|
|
a section of barbecue grid between
200 and 250 mm wide by about 250 mm long |
|
|
a simple handle to control the
barbecue grid |
|
|
a CADAC Mini Pizza Stone
25 cm in diameter and about 13 mm thick |
![]() See the Barbecue Grid and
Mini Pizza Stone in Detail
See the Barbecue Grid and
Mini Pizza Stone in Detail
A Barbecue Grid
![]() See the Barbecue Grid in
Detail
See the Barbecue Grid in
Detail
We reworked the remnant
of a barbecue grid. It needs to be truly
flat so as to give uniform support and heat distribution into the stone. A simple, but reliable, handle is
recommended—one that can be folded up when you close the oven door.
Use of the Pizza
Stone
We used a CADAC Mini
Pizza Stone 25 cm in diameter and 13 mm thick. (www.cadac.co.za) We got ours locally. (www.homesteadcaravans.co.uk) Keep liquids off it. Allow it to heat up gradually before adding
pizzas etc. After use, allow it to cool
down slowly—preferably as the oven itself does—and then clean it by scraping
and brushing.
Place the stone onto the
barbecue grid and then slide it into the oven.
![]() See the Mini Pizza Stone
Being Inserted in the Oven
See the Mini Pizza Stone
Being Inserted in the Oven
Push the grid and stone
all the way into the oven and fold the handle up.
![]() See the Pizza Stone Ready
in the Oven
See the Pizza Stone Ready
in the Oven
Pre-heat the oven and
pizza stone in it for about 10 minutes before sliding the pizza onto the stone.
![]() See the Wood-Burning Fire
Under the Oven
See the Wood-Burning Fire
Under the Oven
Use of the Fire
Chamber
When using the fire
chamber as a wood burner under the oven, a metal tray (like an old baking or
roasting pan) can be inserted on some suitable, dense bricks. This positions the fire nearer the underside
of the oven. In this way a small fire is
quite sufficient to cook pizzas, and the like.
We often cook with twigs as small as a finger, but they burn away quite
quickly and need frequent topping up with more fuel to maintain a steady
temperature in the oven.
![]() Watch the full video of
the oil drum and oven (3m:10s)
Watch the full video of
the oil drum and oven (3m:10s)
STAGE 4:
PORTABLE OR FIXED JASPELLIZZA OVEN

The portable Jaspellizza
oven could be formed into a ‘sunrise’ D-shape.
The flat base could be made 330 mm wide using the central part of a
1000 mm×500 mm×22 SWG thick standard
steel sheet. The sides would be bent up vertically for
44 mm and then bent over with a radius of 165 mm. This leaves 32 mm ends extending beyond
the centreline at the top. These ends
could either by overlapped and bolted through along the centreline or bent
vertically upwards side-by-side and bolted through, so that the upstand can be
formed into a handle and two holes for hanging over a fire. The rear end could be folded up and over and
bolted (or welded), forming a sufficiently smoke-proof seal.
For use as a portable
device to be placed on a frontier fire, campfire, or barbecue, a flat door flap
could be made and hinged along the bottom front edge. This would be folded up and held closed with
a clip mounted centrally on the top of the body.
Alternatively, a
Jaspellizza oven with this shape could be fixed inside a drum instead of
the rectangular oven. As described
above, the front edges could be cut into tabs to match the curvature inside the
oil drum and then tightly bolted onto it with fireproof sealant.
Date of
last edit: 27 October 2017 Jasper
Burford and Ellen Burford Be happy
and kind!